Why Remote Car Battery Replacement is a Must for Vehicle Owners
Replacing the car remote battery is one of the easiest and cheapest DIY car repairs you can do. However, many vehicle owners tend to overlook this essential maintenance task, leading to a myriad of problems down the line. In this article, we'll explore the reasons why remote car battery replacement is a must for vehicle owners and provide a comprehensive guide on how to do it.
Signs of a Dying Remote Car Battery
Before we dive into the replacement process, it's essential to know the signs of a dying remote car battery. If your car remote is struggling to function or has stopped working altogether, it's likely due to a dead battery. Some common signs include:
- Weak signal strength - You may need to press the button multiple times to get a response.
- Unreliable or inconsistent performance - The remote may not respond or perform as expected.
- Need to replace the battery frequently - If you find yourself replacing the battery often, it's likely a sign of a dying battery.
Why Replace Remote Car Battery Early?
Replacing the remote car battery early can save you time, money, and the hassle of being locked out of your vehicle. Imagine the convenience of never worrying about your remote failing you again. By learning how to replace the battery yourself, you take control and keep your car accessible at all times.
What You Need to Replace Remote Car Battery
To replace the remote car battery, you'll need a few basic tools and materials. Here's a list of what you'll need:
- Replacement battery (ensure you get the correct type and size for your remote)
- Torx screwdriver (for some models)
- Plastic spudger (for some models)
- Wire strippers (for some models)
- New remote cover or trim
Step-by-Step Guide to Replace Remote Car Battery
Replacing the remote car battery is a relatively straightforward process. Here's a step-by-step guide to help you replace the battery in your car remote:
Step 1: Open the Remote Cover
Start by removing the trim or cover on your remote. You'll need to use a Torx screwdriver for this step. Once you've removed the screws, you'll see the battery compartment inside.
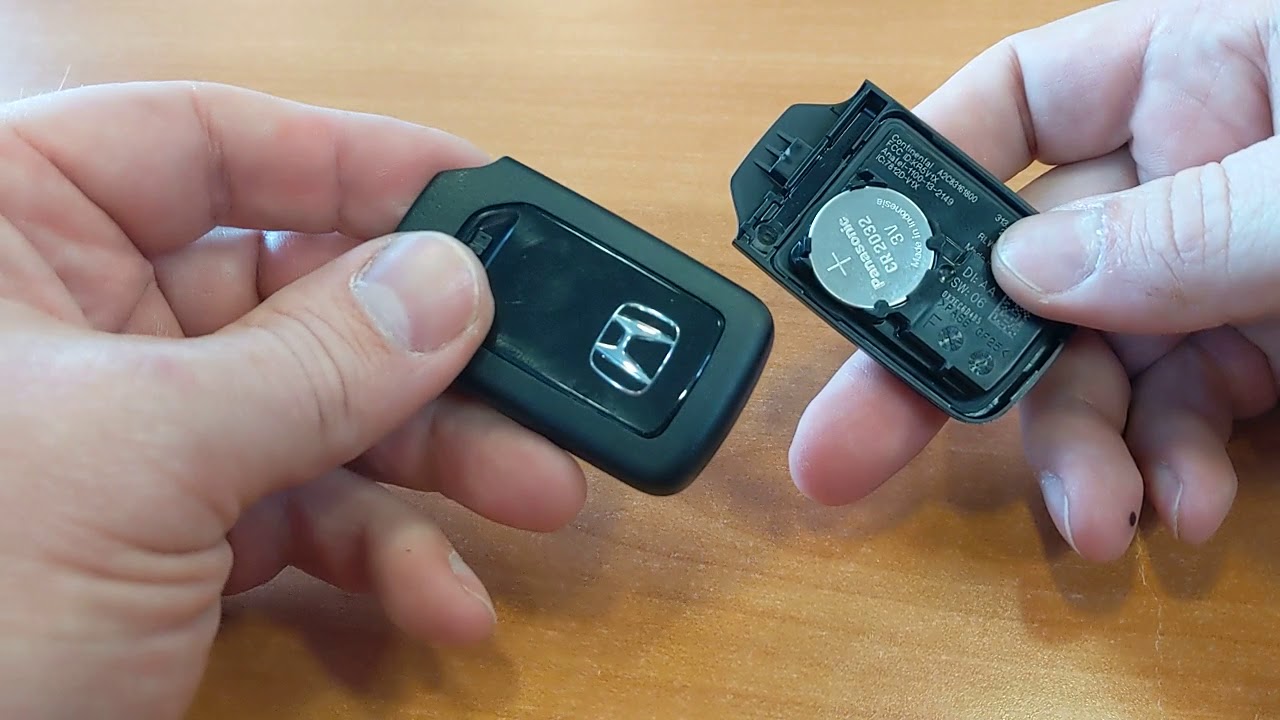
Step 2: Remove the Old Battery
Use a plastic spudger to carefully pry open the battery compartment. You might need to use a bit of force, so be gentle to avoid damaging the remote. Once the compartment is open, you'll see the old battery. Use a wire stripper to remove any connectors or tabs that hold the battery in place.
Step 3: Remove the Old Battery (continued)
Once you've removed the battery, you'll need to remove any remaining connectors or tabs. Use a Torx screwdriver to remove any screws that hold the battery holder in place. Gently pull the battery holder out, and you'll see the battery wires.
Step 4: Disconnect the Battery Wires
Use a wire stripper to remove any insulation from the battery wires. You'll see two wires: positive (+) and negative (-). Use a plastic spudger to gently pry the wires away from the battery terminal.
Step 5: Remove the Battery Gasket
Look for the battery gasket that seals the battery compartment. You'll need to remove this to replace the battery. Use a plastic spudger to gently pry the gasket away from the battery compartment.
Step 6: Install the New Battery
Take the new battery and insert it into the battery compartment. Make sure it's seated properly and secure. If your remote has a battery holder, you'll need to attach it to the new battery. Use a Torx screwdriver to secure the holder in place.


