How to Solve a Rubik's Cube: A Comprehensive Guide
The Rubik's Cube is a mechanical puzzle that has been a source of fascination for millions of people worldwide. It's a 3D puzzle that consists of six colored faces, each covered with a 9x9 grid of smaller squares. The goal is to rotate the layers of the cube to align the colors on each face, resulting in a solid blue and white cube. In this article, we'll explore the step-by-step process of how to solve a Rubik's Cube, both the 3x3x3 and 4x4x4 versions.
History of the Rubik's Cube
The Rubik's Cube was invented by Hungarian professor Ernő Rubik in 1974. It was initially named the "Magic Cube" but later renamed after its creator. The cube became a worldwide sensation in the 1980s, with an estimated 100 million cubes sold by the mid-80s.
Notation System
Before we dive into the solving process, it's essential to understand the notation system used to describe the moves. The most common notation system is the "F2L" (First Two Layers) notation. It consists of a series of letters and numbers that represent the moves: U: Up layer D: Down layer L: Left layer R: Right layer F: Front layer B: Back layer x: Rotate the U layer clockwise y: Rotate the U layer counterclockwise '’: Rotate the U and L layers clockwise +: Rotate the U and L layers counterclockwise
Step 1: Understanding the Basics
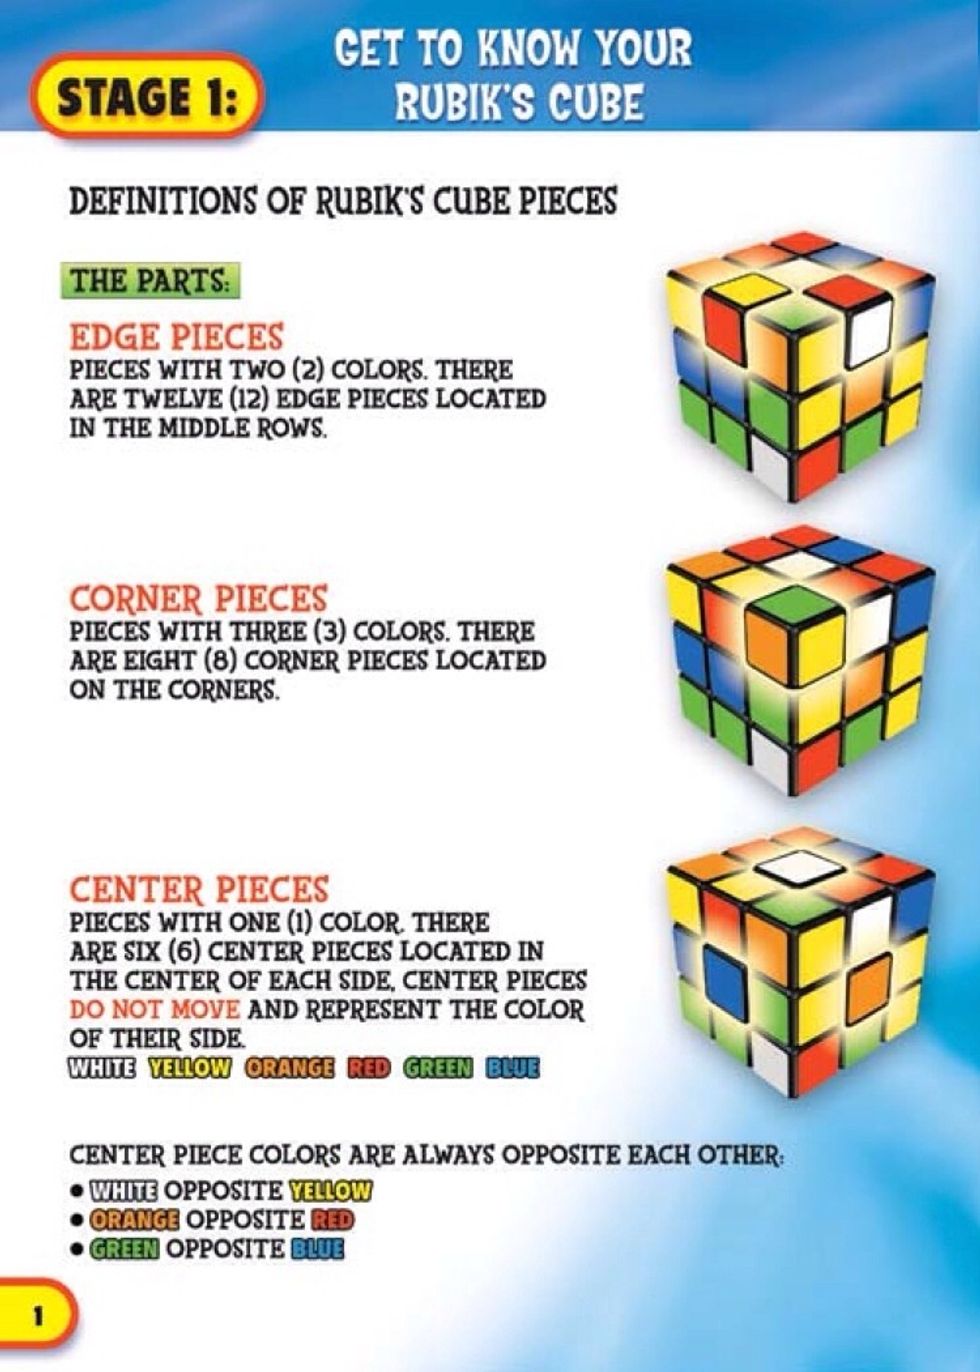
The Rubik's Cube consists of 54 colored stickers, placed on a 3x3x3 matrix of 20 smaller cubes. Each face of the cube has nine colored squares, and the goal is to rotate the layers to align the colors.
Step 2: Learning the Notation
Become familiar with the notation system. Practice rotating the layers using the letters and numbers to understand how to describe the moves.
Step 3: Mastering the Cross
The first step in solving the Rubik's Cube is to create a white cross on the top face. To do this, focus on solving one pair of opposite edges, then move on to the next pair. Use the notation system to describe the moves and practice rotating the layers until you can efficiently solve one pair at a time.
Step 4: Solving the Corners
Once you have the white cross in place, focus on solving the four corner pieces. Use a combination of moves to rotate the corners into their correct positions. Practice regularly to build muscle memory and speed.
Step 5: Solving the Middle Layer
With the cross and corners in place, move on to solving the middle layer. Use a combination of moves to rotate the middle cubes into their correct positions. Practice regularly to build muscle memory and speed.
Step 6: Solving the Last Layer
The final step is to solve the last layer, which involves orienting the remaining edge pieces and corner pieces. Use a combination of moves to rotate the pieces into their correct positions, and practice regularly to build muscle memory and speed.
Advanced Methods
There are several advanced methods for solving the Rubik's Cube, including the "F2L" and "OLL" methods. These methods involve using more complex algorithms to solve the cube layer by layer.
Online Resources and Tools
There are many online resources and tools available to help you learn how to solve the Rubik's Cube. Some popular options include online tutorials, videos, and step-by-step guides. You can also use online solvers, such as the one provided by Ruwix, to help you practice solving the cube.
Conclusion
Solving the Rubik's Cube requires practice, patience, and persistence. By following the step-by-step guide above, you'll be well on your way to mastering the puzzle. Don't be discouraged if you struggle at first – with regular practice, you'll be able to solve the cube in no time.


 - YouTube")


")


![How to Solve a Rubik's Cube [Best Method 2026] - YouTube](https://www.gift-supplier.com/img/cms/blog-img/Rubiks-cube/gift-supplier-help-you-to-restore-2x2-rubiks-cube.png "How to Solve a Rubik's Cube [Best Method 2026] - YouTube")
 - Grubiks")