How to Set Up a Printer Wireless on Ubuntu: A Step-by-Step Guide
If you're a Ubuntu user who wants to set up a wireless printer, you've come to the right place. In this article, we'll show you how to set up a wireless printer on Ubuntu using the Printing wizard and other tools. Whether you're a beginner or an advanced user, this guide will walk you through the process step by step.
Prerequisites
Before you start, make sure you have the following:
- A wireless printer that's compatible with Ubuntu
- A Ubuntu installation connected to the same network as the printer
- The printer's password and SSID (Network Name)
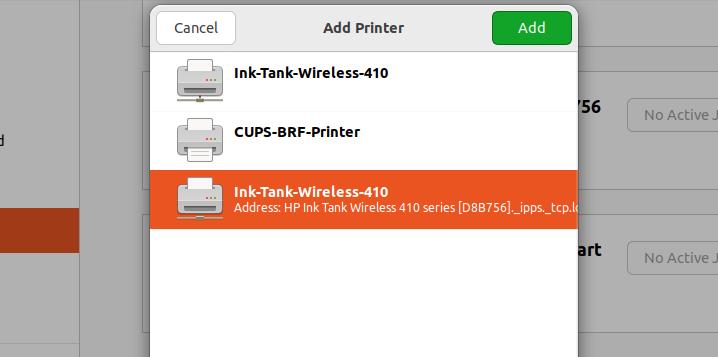
Method 1: Using the Printing Wizard
The first method to set up a wireless printer on Ubuntu is to use the Printing wizard. This wizard will guide you through the process of adding the printer to your Ubuntu system.
To access the Printing wizard, follow these steps:
- Open the Settings app on your Ubuntu system.
- Click on Printers and then click on Add.
- Select Network printer and click on Continue.
- Enter your printer's name and password, and then click on OK.
- Wait for the printer to be added to your Ubuntu system.
Method 2: Using CUPS
Another method to set up a wireless printer on Ubuntu is to use the Common Unix Printing System (CUPS). CUPS is a print manager that allows you to add and manage printers on your Ubuntu system.
To add a wireless printer using CUPS, follow these steps:
- Open the Terminal app on your Ubuntu system.
- Enter the following command:
sudo apt-get install cups - Start the CUPS service:
sudo service cups start - Add the printer by entering the following command:
lpadmin -p printer_name - Enter your printer's name and password, and then click on OK.
- Wait for the printer to be added to your Ubuntu system.
Method 3: Using Samba
The third method to set up a wireless printer on Ubuntu is to use Samba. Samba is a file system and printer sharing service that allows you to share printers with other devices on your network.
To add a wireless printer using Samba, follow these steps:
- Open the Terminal app on your Ubuntu system.
- Enter the following command:
sudo apt-get install samba - Start the Samba service:
sudo service samba start - Add the printer by entering the following command:
smbpasswd -a username - Enter your printer's name and password, and then click on OK.
- Wait for the printer to be added to your Ubuntu system.
Troubleshooting
If you encounter any issues while adding your wireless printer to Ubuntu, here are some troubleshooting tips:
- Make sure that the printer is connected to the same network as your Ubuntu system.
- Check that the printer's password and SSID are correct.
- Try restarting the CUPS or Samba service.
- Check the system logs to see if there are any error messages related to the printer.
Conclusion
Setting up a wireless printer on Ubuntu is a straightforward process that can be completed in a few steps. Whether you choose to use the Printing wizard, CUPS, or Samba, we've provided step-by-step guides to help you get started. If you encounter any issues during the process, don't hesitate to refer to our troubleshooting tips to resolve any problems.


