Tablet Motherboard Repair: A Comprehensive Guide
Are you experiencing issues with your tablet's performance or has it become completely non-functional? If yes, then the problem might be with the motherboard. The tablet motherboard is a crucial component that connects all the hardware and software components of the device. In this article, we will discuss the importance of tablet motherboard repair and provide a step-by-step guide on how to diagnose and repair your tablet motherboard.
Why is Tablet Motherboard Repair Necessary?
- The tablet motherboard is responsible for connecting all the hardware and software components of the device.
- A damaged or corrupted motherboard can render the tablet unusable.
- Malfunctions in the motherboard can lead to problems like freezing, crashing, and poor performance.
- Recovering from a damaged motherboard can be challenging without proper knowledge and expertise.
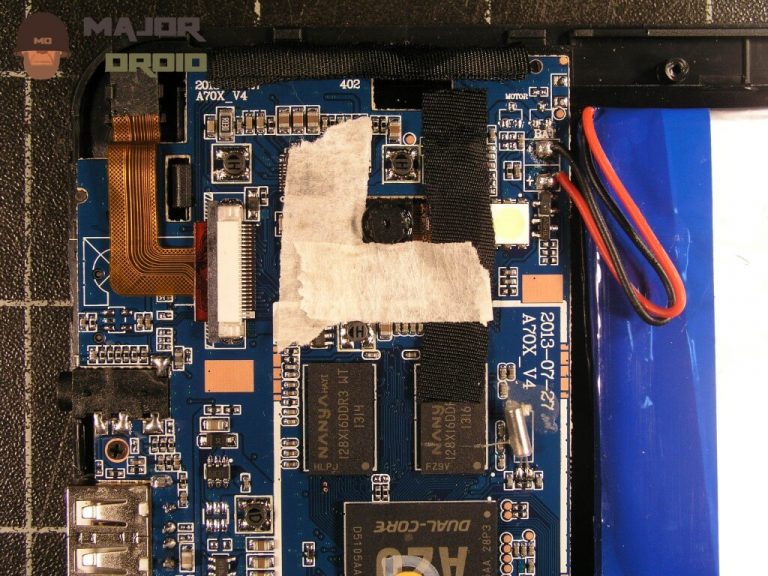
Diagnosing Tablet Motherboard Issues
Before attempting to repair your tablet motherboard, you need to diagnose the problem. Here are some common methods to help you identify the issue:
- Visual Inspection: Start by visually inspecting the motherboard for any visible signs of damage, such as burn marks, cracks, or water damage.
- Symptom Analysis: Examine the device's performance issues, such as freezing, crashing, or poor battery life.
- Electrical tests: Use a multimeter to check for electrical connections and identify any short circuits or faulty components.
- Log Files: Check log files for any errors or system crashes that may indicate a motherboard issue.
Tools Required for Tablet Motherboard Repair
To repair your tablet motherboard, you will need the following tools:
- Multimeter: Used to test electrical connections and diagnose short circuits.
- Soldering Iron: Required to desolder and resolder components.
- PCB Cleaner: Used to clean the motherboard and remove any residue or debris.
- Thermal Tape: To remove heat transfer silicone to prevent overheating.
- component level PCB replacement tools (should you choose to replace the motherboards instead of repair)
Step-by-Step Motherboard Repair Process
After diagnosing the issue and gathering the necessary tools, follow these steps to repair your tablet motherboard:
- Disconnect all power sources, including the battery and power adapter.
- Remove any outer casing or casing that covers the motherboard.
- Locate the damaged component and remove it using a soldering iron.
- Use a multimeter to test electrical connections and identify any short circuits or faulty components.
- Apply thermal tape to prevent overheating and ensure safety.
- Reassemble the device and test it to ensure the issue is resolved.
Conclusion
Repairing a tablet motherboard can be a challenging task. However, with the right tools, knowledge, and expertise, it can be done successfully. If you are unsure or uncomfortable performing the repair yourself, it's always best to seek professional help from a qualified technician.
Additional Tips
tablet motherboard repair, visit websites like iFixScreens or The Repair Depot for assistance. Their experts will help you diagnose and replace your tablet's motherboard, ensuring a hassle-free experience.”
Tablet motherboard repair services like iFixScreens and TheRepairDepot also offer a quick and affordable way to fix your tablet. These services will diagnose the problem, repair or replace the motherboard, and ensure your tablet is up and running again.


