Water Damage Dryer Vent Installation: A Comprehensive Guide
Dryer vent installation is an essential aspect of maintaining a safe and efficient home. However, improper installation or damage to the vent system can lead to water damage and other hazardous consequences. In this article, we will explore the importance of a proper water damage dryer vent installation and provide step-by-step guides on how to ensure a safe and efficient dryer vent system.
Why Water Damage Dryer Vent Installation is Critical
Water damage is a common issue that can arise from a malfunctioning dryer vent system. When the vent system is clogged or damaged, it can cause water to leak into your home, leading to mold growth, structural damage, and even health hazards. A properly installed vent system helps to prevent these issues by ensuring that heat, moisture, and lint are safely expelled from your home.
Types of Water Damage Caused by Dryer Vent Installation
- Moisture Buildup: A clogged vent system can cause moisture to buildup in your walls and ceilings, leading to mold growth and water damage.
- Electrical Fires: A damaged or clogged vent system can cause electrical components to overheat, leading to fires.
- Rusting and Corrosion: Moisture buildup in the vent system can cause rusting and corrosion of metal components, leading to structural damage and compromise.
- Reduced Efficiency: A clogged or damaged vent system can reduce the efficiency of your dryer, leading to higher energy bills and reduced performance.
Choosing the Right Dryer Vent Material
When it comes to choosing the right dryer vent material, there are several options available. Some popular options include:
- Metal: Metal ducting is the most popular choice for dryer vents due to its durability and resistance to heat.
- PVC: PVC pipe is a popular alternative to metal ducting, but it is not recommended for dryer vent installation due to its potential for heat damage.
- Rigid Foil: Rigid foil ducting is another popular option, but it is not recommended for dryer vent installation due to its potential for heat damage and installation difficulties.
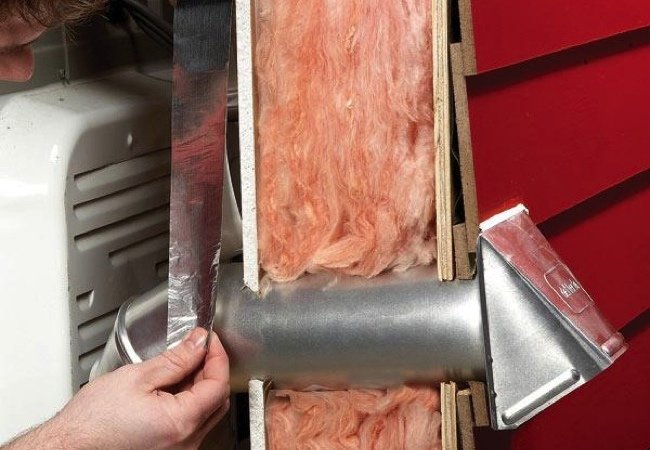
Step-by-Step Dryer Vent Installation Guide
Here is a step-by-step guide to installing a safe and efficient dryer vent system:
- Step 1: Plan the Installation: Plan the installation of the vent system to ensure it is properly sized and routed.
- Step 2: Prepare the Vent: Prepare the vent system by cleaning and inspecting it for damage.
- Step 3: Install the Vent Hood: Install the vent hood and ensure it is properly sealed.
- Step 4: Run the Vent Duct: Run the vent duct through the roof or wall, ensuring it is properly supported and secured.
- Step 5: Secure the Vent End: Secure the vent end and ensure it is properly sealed.
- Step 6: Test the Vent System: Test the vent system to ensure it is working properly and safely.
Conclusion
Proper water damage dryer vent installation is crucial for maintaining a safe and efficient home. A clogged or damaged vent system can lead to water damage, electrical fires, rusting and corrosion, and reduced efficiency. By choosing the right materials and following a step-by-step installation guide, you can ensure a safe and efficient dryer vent system that will provide years of reliable service. Don't let a malfunctioning dryer vent system cause water damage and other hazards in your home. Install a proper water damage dryer vent installation today!


:max_bytes(150000):strip_icc()/how-to-hook-up-dryer-vent-1824608-04-3856f0d0aaa74b0dab315d06b574455a.jpg "Residential Washer Drain Hose Replacement Services in Tampa")


